You will learn how you can create a Business Email for free. I will show you step by step how to set up your email address so it will look something like this – info@yourbusiness.com
You will need access to your domain hosting provider; we will use SiteGround as an example today.
You will need access to your Gmail account.
Why is a branded email better than a plain Gmail address when sending emails from your business?
It has multiple benefits when you send an email to potential customers from a professional-looking email address.
Among many reasons I name a few:
- You will look professional by using your company- or brand name extension in your email address.
- Sending an email from your business account improves brand consistency and gives a good impression.
- A Business Email is directly associated with your business and/or website, making it easier to remember for anyone receiving your emails.
Setting up your Business Email – step by step.
- Login to your domain host and go to your “Site Tools” and the “Dashboard”.
- You will need to find the “Email Accounts” option.
- Follow the prompts and create a new email account.
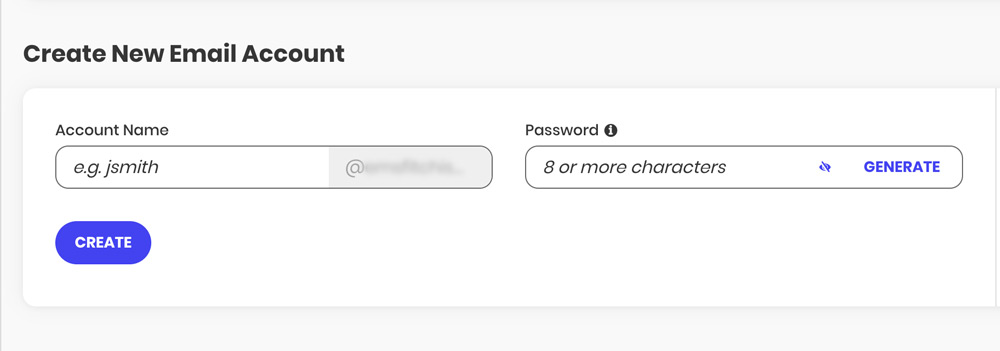
Now you have a branded Business Email, but it is separate from your Gmail address. You need to add a forwarder. Why?
With a forwarder, a copy will go to your Gmail inbox when an email is sent to your Business Email.
- Find the “Forwarder” option in the menu.
- Create a new rule (image below).
- Use the email address you have previously created.
- Forward it to the Gmail address where you want to receive a copy of each email sent to this business address.
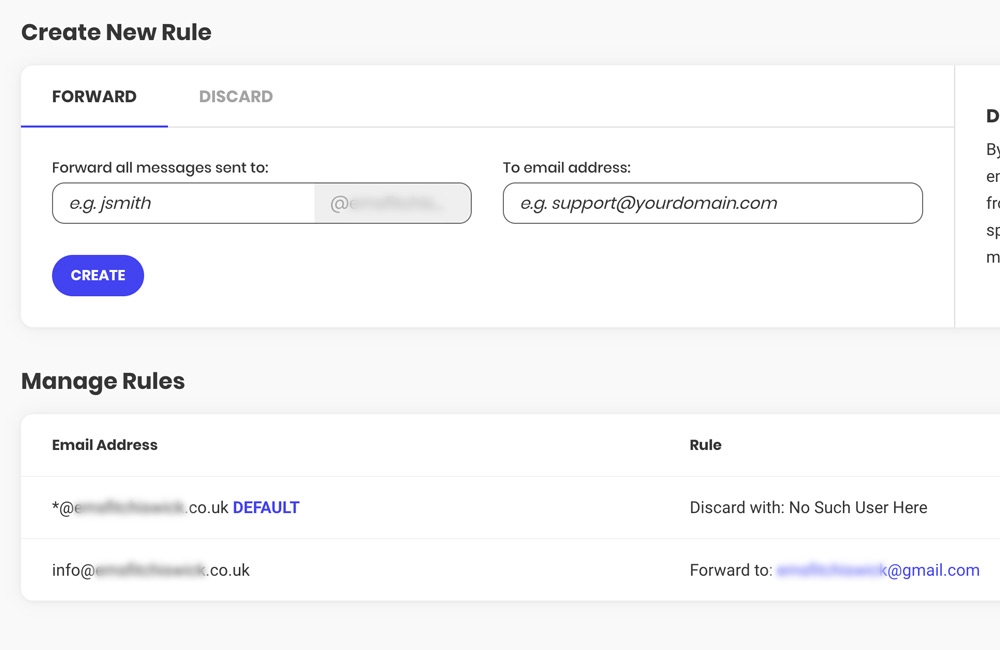
When done, emails to the Business Email address will also be sent to your Gmail address.
It is great, but there is a problem. You cannot yet reply from within Gmail with your Business Email. We are going to set up this option. And for that, we are going to log in to your Gmail.
Do not close your Hosting Provider’s window just yet. We will need it soon.
- Login to your Gmail.
- Upper right corner, click the settings cogwheel.
- Click “See all settings”.
- Click “Accounts and imports”.
- Click “Add another email address”.
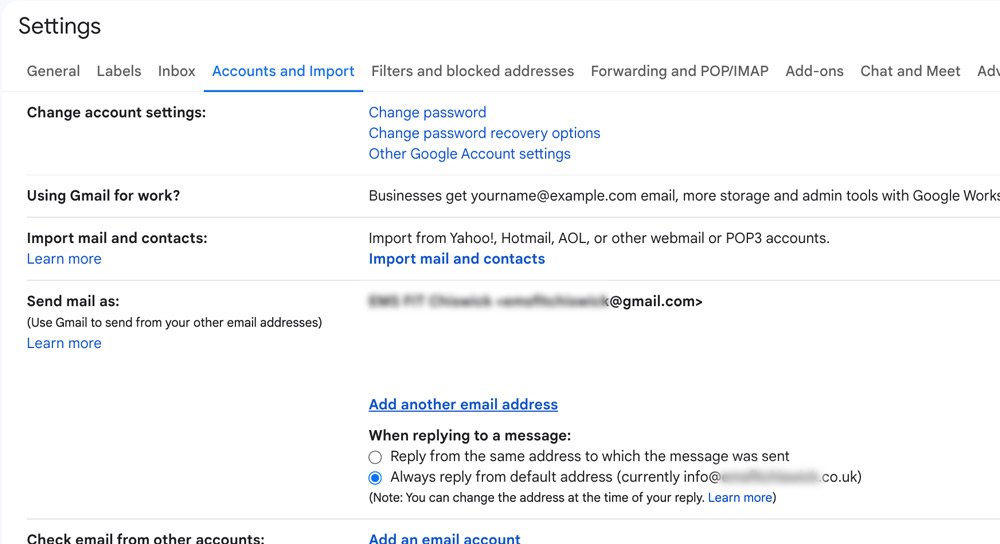
- A separate window will pop up.
- Follow the prompts and fill in the details.
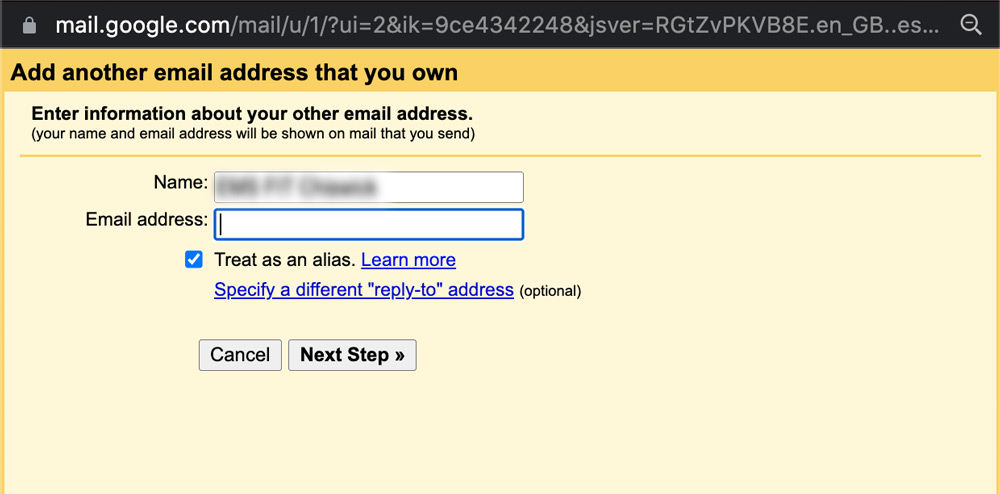
- In the second window, you will need to add your SMTP details.
- Find your SMTP details on your Domain Hosting site.
- Open the hosting and, in “Email accounts”, find the “Email configuration” option.
- Look for details like these.
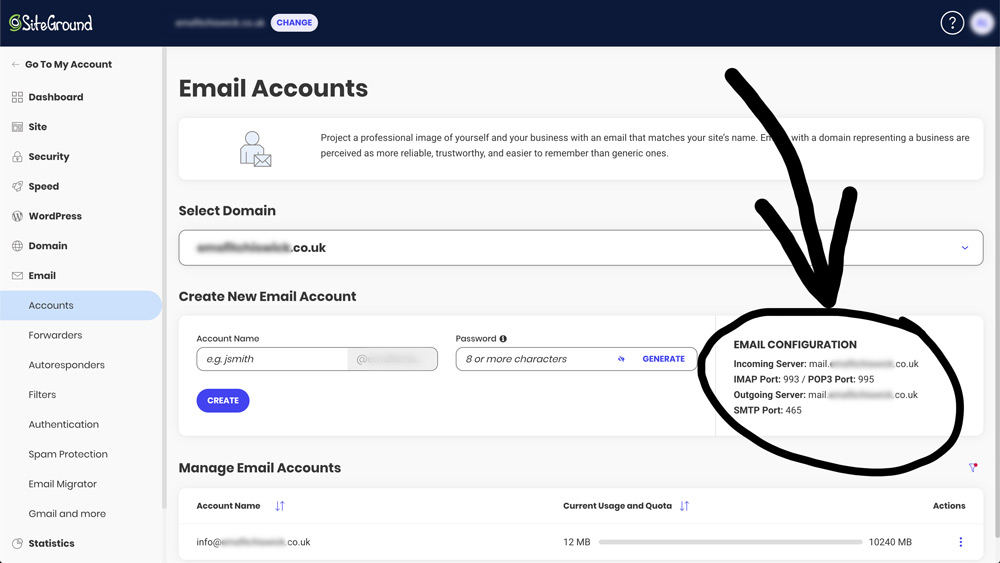
- Copy the “Outgoing Server” details and the “SMTP Port” and paste them to the window we opened in the Gmail Account settings.
- Follow the prompts, and wait for it to finish setting up
- You will get a message when it is done correctly.
- Your Business Email address is now added to your Gmail account.
- Under “Accounts and Imports”, you should see a second email address. The one you have successfully added just now (image below).
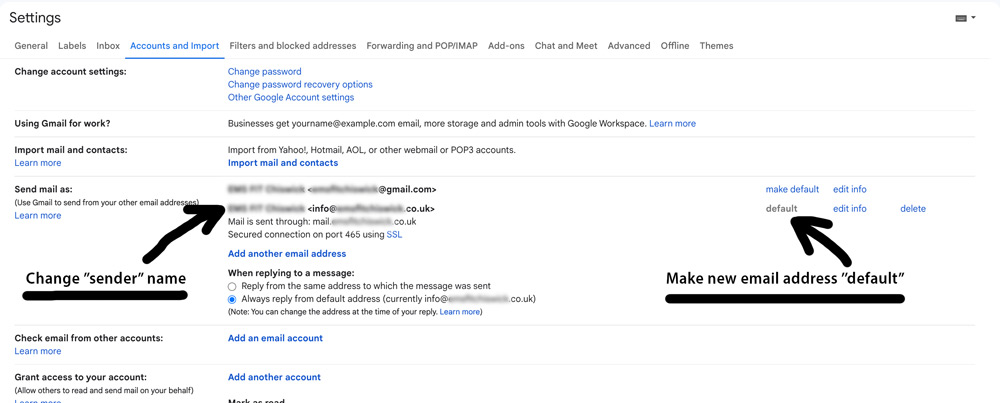
- Change the name of the “sender” to anything that suits your business. The receiver will see this name in their inbox when you email them. It can either be your name or your brand name.
- Make this newly added business address “default”.
- Close the settings window.
- Try “Compose” a new email.
- You will notice the new “sender” details and a new Business Email address was added.
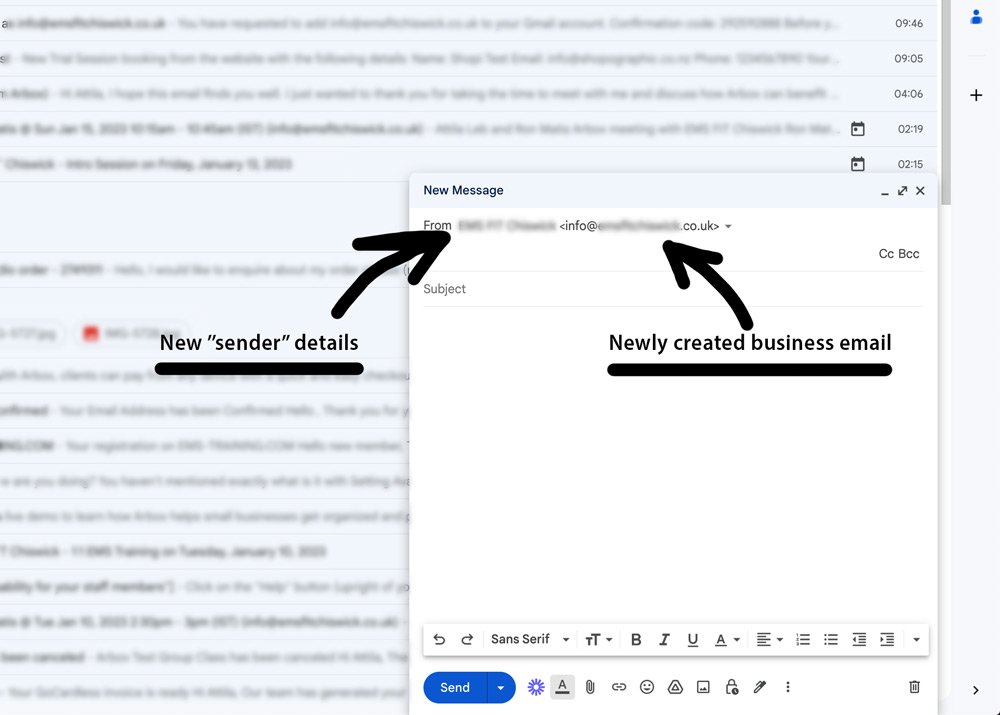
From now on, you will be able to receive and send emails from your newly created Business Email address.
Follow this blog as I share hands-on marketing tips with readers that I find helpful.
Thank you for reading my post.
I am Shopi.
I help businesses build solid online foundations.


